2022. 10. 10. 15:50ㆍDev.Program/Android
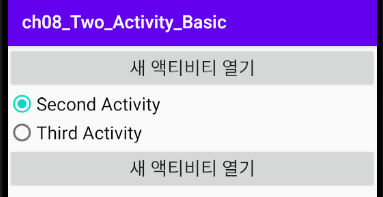
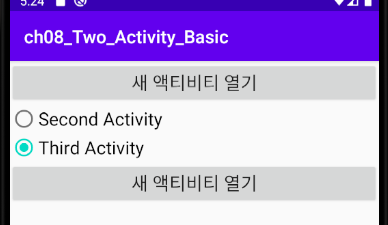
< activity_main.xml >
<?xml version="1.0" encoding="utf-8"?>
<LinearLayout xmlns:android="http://schemas.android.com/apk/res/android"
xmlns:app="http://schemas.android.com/apk/res-auto"
xmlns:tools="http://schemas.android.com/tools"
android:layout_width="match_parent"
android:layout_height="match_parent"
tools:context=".MainActivity"
android:orientation="vertical">
<Button
android:layout_width="match_parent"
android:layout_height="wrap_content"
android:id="@+id/btnNewActivity"
android:text="새 액티비티 열기"
android:textSize="20sp"/>
<RadioGroup
android:layout_width="match_parent"
android:layout_height="wrap_content"
android:id="@+id/rGroup">
<RadioButton
android:layout_width="wrap_content"
android:layout_height="wrap_content"
android:id="@+id/rbSecondActivity"
android:text="Second Activity"
android:textSize="20sp"/>
<RadioButton
android:layout_width="wrap_content"
android:layout_height="wrap_content"
android:id="@+id/rbThirdActivity"
android:text="Third Activity"
android:textSize="20sp"/>
</RadioGroup>
<Button
android:layout_width="match_parent"
android:layout_height="wrap_content"
android:id="@+id/btnNewActivity2"
android:text="새 액티비티 열기"
android:textSize="20sp"/>
</LinearLayout>
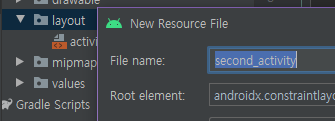
< second_activity.xml >
<?xml version="1.0" encoding="utf-8"?>
<LinearLayout
xmlns:android="http://schemas.android.com/apk/res/android"
android:layout_width="match_parent"
android:layout_height="match_parent"
android:background="#00FF88">
<Button
android:layout_width="match_parent"
android:layout_height="wrap_content"
android:id="@+id/btnReturn"
android:text="돌아가기"
android:textSize="20sp"/>
</LinearLayout>
< third_activity.xml >
<?xml version="1.0" encoding="utf-8"?>
<LinearLayout
xmlns:android="http://schemas.android.com/apk/res/android"
android:layout_width="match_parent"
android:layout_height="match_parent"
android:background="#555588">
<Button
android:layout_width="match_parent"
android:layout_height="wrap_content"
android:id="@+id/btnReturn"
android:text="돌아가기"
android:textSize="20sp"/>
</LinearLayout>
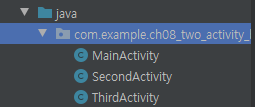
< MainActivity.java >
package com.example.ch08_two_activity_basic;
import androidx.appcompat.app.AppCompatActivity;
import android.content.Intent;
import android.os.Bundle;
import android.view.View;
import android.widget.Button;
import android.widget.RadioButton;
import android.widget.RadioGroup;
public class MainActivity extends AppCompatActivity {
Button btnNewActivity, btnNewActivity2;
RadioGroup rGroup;
RadioButton rbSecondActivity, rbThirdActivity;
@Override
protected void onCreate(Bundle savedInstanceState) {
super.onCreate(savedInstanceState);
setContentView(R.layout.activity_main);
// activity_main.xml 내의 Button 위젯 ID 가져오기
btnNewActivity = findViewById(R.id.btnNewActivity);
btnNewActivity.setOnClickListener(new View.OnClickListener() {
@Override
public void onClick(View v) {
// 버튼 클릭되면 새 액티비티인 SecondActivity 를 실행해야함
// => 이 때, 새 액티비티를 생성하기 위해 Intent 객체 사용
// Intent 객체 생성 시 파라미터로 현재 컨텍스트 객체와 새 액티비티 클래스명 지정
// => 주의! 새 액티비티 클래스명 지정 시 .class 필수!
Intent intent = new Intent(getApplicationContext(), SecondActivity.class);
// startActivity() 메서드를 호출하여 Intent 객체 전달하면 새 액티비티 실행됨
startActivity(intent);
}
});
}
}
< secondActivity.java >
package com.example.ch08_two_activity_basic;
import android.os.Bundle;
import android.view.View;
import android.widget.Button;
import androidx.annotation.Nullable;
import androidx.appcompat.app.AppCompatActivity;
public class SecondActivity extends AppCompatActivity {
// 두번째 액티비티인 SecondActivity 가 실행될 때 onCreate() 메서드가 호출됨
// => onCreate() 메서드 오버라이딩 필수!
@Override
protected void onCreate(@Nullable Bundle savedInstanceState) {
super.onCreate(savedInstanceState);
// 새로운 액티비티에서 표시할 레이아웃(XML)을 setContentView() 메서드로 지정
setContentView(R.layout.second_activity); // second_activity.xml 파일을 기본 레이아웃으로 지정
// second_activity.xml 내의 Button 위젯 ID 가져오기
// => 주의! 현재 액티비티에 second_activity.xml 파일이 연결되어 있으므로
// findViewById() 메서드를 그냥 호출하면 된다!
Button btnReturn = findViewById(R.id.btnReturn);
btnReturn.setOnClickListener(new View.OnClickListener() {
@Override
public void onClick(View v) {
// 현재 액티비티를 종료하고 기존의 액티비티로 돌아가기
finish();
}
});
}
}


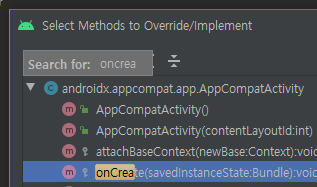
- 꼭 구현해야하는 메서드 onCreate() ⇒ Ctrl + O
< ThirdActivity.java >
package com.example.ch08_two_activity_basic;
import android.os.Bundle;
import android.view.View;
import android.widget.Button;
import androidx.annotation.Nullable;
import androidx.appcompat.app.AppCompatActivity;
public class ThirdActivity extends AppCompatActivity {
@Override
protected void onCreate(@Nullable Bundle savedInstanceState) {
super.onCreate(savedInstanceState);
setContentView(R.layout.third_activity);
Button btnReturn = findViewById(R.id.btnReturn);
btnReturn.setOnClickListener(new View.OnClickListener() {
@Override
public void onClick(View v) {
finish();
}
});
}
}

< AndroidManifest.xml >
<?xml version="1.0" encoding="utf-8"?>
<manifest xmlns:android="http://schemas.android.com/apk/res/android"
package="com.example.ch08_two_activity_basic">
<application
android:allowBackup="true"
android:icon="@mipmap/ic_launcher"
android:label="@string/app_name"
android:roundIcon="@mipmap/ic_launcher_round"
android:supportsRtl="true"
android:theme="@style/AppTheme">
<activity android:name=".MainActivity">
<intent-filter>
<action android:name="android.intent.action.MAIN" />
<category android:name="android.intent.category.LAUNCHER" />
</intent-filter>
</activity>
<!-- 새 액티비티를 사용하기 위해서는 activity 태그를 사용하여 액티비티 클래스 등록 필수! -->
<activity android:name=".SecondActivity" android:label="Second 액티비티"/>
<activity android:name=".ThirdActivity" android:label="Third 액티비티"/>
</application>
</manifest>
< MainActivity.java >
btnNewActivity2.setOnClickListener(new View.OnClickListener() {
@Override
public void onClick(View v) {
Intent intent = null;
switch (rGroup.getCheckedRadioButtonId()) {
// 선택된 라디오 버튼에 따라 각각 다른 Intent 객체 생성
case R.id.rbSecondActivity:
intent = new Intent(getApplicationContext(), SecondActivity.class);
break;
case R.id.rbThirdActivity:
intent = new Intent(getApplicationContext(), ThirdActivity.class);
}
// 생성된 intent
startActivity(intent);
}
});
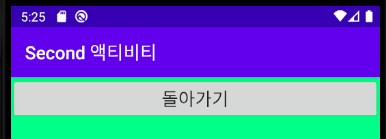
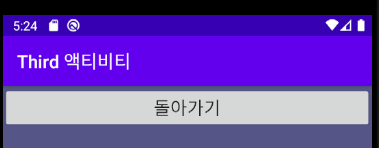
- 배경 색이 다름!
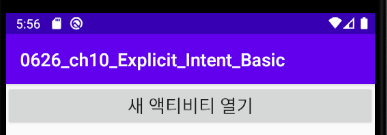
======== 0626_ch10_Explicit_Intent_Basic
< activity_main.xml >
<?xml version="1.0" encoding="utf-8"?>
<LinearLayout xmlns:android="http://schemas.android.com/apk/res/android"
xmlns:app="http://schemas.android.com/apk/res-auto"
xmlns:tools="http://schemas.android.com/tools"
android:layout_width="match_parent"
android:layout_height="match_parent"
tools:context=".MainActivity"
android:orientation="vertical">
<Button
android:layout_width="match_parent"
android:layout_height="wrap_content"
android:id="@+id/btnNewActivity"
android:text="새 액티비티 열기"
android:textSize="20sp"/>
</LinearLayout>
< second_activity.xml >
<?xml version="1.0" encoding="utf-8"?>
<LinearLayout
xmlns:android="http://schemas.android.com/apk/res/android"
android:layout_width="match_parent"
android:layout_height="match_parent"
android:orientation="vertical">
<TextView
android:layout_width="match_parent"
android:layout_height="wrap_content"
android:id="@+id/tvResult"
android:text="전달받은 데이터 : "
android:textSize="20sp"/>
<Button
android:layout_width="match_parent"
android:layout_height="wrap_content"
android:id="@+id/btnReturn"
android:text="돌아가기"
android:textSize="20sp"/>
</LinearLayout>
< AndroidManifests.xml >
<?xml version="1.0" encoding="utf-8"?>
<manifest xmlns:android="http://schemas.android.com/apk/res/android"
package="com.example.a0626_ch10_explicit_intent_basic">
<application
android:allowBackup="true"
android:icon="@mipmap/ic_launcher"
android:label="@string/app_name"
android:roundIcon="@mipmap/ic_launcher_round"
android:supportsRtl="true"
android:theme="@style/AppTheme">
<activity android:name=".MainActivity">
<intent-filter>
<action android:name="android.intent.action.MAIN" />
<category android:name="android.intent.category.LAUNCHER" />
</intent-filter>
</activity>
<activity android:name=".SecondActivity" android:label="Second Activity"/>
</application>
</manifest>
< SecondActivity.java >
package com.example.a0626_ch10_explicit_intent_basic;
import android.os.Bundle;
import android.view.View;
import android.widget.Button;
import android.widget.TextView;
import androidx.annotation.Nullable;
import androidx.appcompat.app.AppCompatActivity;
public class SecondActivity extends AppCompatActivity {
@Override
protected void onCreate(@Nullable Bundle savedInstanceState) {
super.onCreate(savedInstanceState);
setContentView(R.layout.second_activity);
TextView tvResult = findViewById(R.id.tvResult);
Button btnReturn = findViewById(R.id.btnReturn);
btnReturn.setOnClickListener(new View.OnClickListener() {
@Override
public void onClick(View v) {
finish();
}
});
}
}
< MainActivity.java >
package com.example.a0626_ch10_explicit_intent_basic;
import androidx.appcompat.app.AppCompatActivity;
import android.content.Intent;
import android.os.Bundle;
import android.view.View;
import android.widget.Button;
public class MainActivity extends AppCompatActivity {
@Override
protected void onCreate(Bundle savedInstanceState) {
super.onCreate(savedInstanceState);
setContentView(R.layout.activity_main);
Button btnNewActivity = findViewById(R.id.btnNewActivity);
btnNewActivity.setOnClickListener(new View.OnClickListener() {
@Override
public void onClick(View v) {
Intent intent = new Intent(getApplicationContext(), SecondActivity.class);
// 명시적 인텐트에서 새 액티비티로 데이터를 전달하려면
// Intent 객체의 putExtra() 메서드를 호출하여 파라미터명, 데이터 형태로 전달
intent.putExtra("value", 99);
intent.putExtra("name", "홍길동");
startActivity(intent);
}
});
}
}
< SecondActivity.java >
@Override
protected void onCreate(@Nullable Bundle savedInstanceState) {
super.onCreate(savedInstanceState);
setContentView(R.layout.second_activity);
TextView tvResult = findViewById(R.id.tvResult);
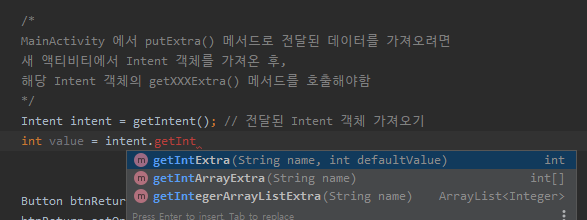
/*
MainActivity 에서 putExtra() 메서드로 전달된 데이터를 가져오려면
새 액티비티에서 Intent 객체를 가져온 후,
해당 Intent 객체의 getXXXExtra() 메서드를 호출해야함
*/
Intent intent = getIntent(); // 전달된 Intent 객체 가져오기
// 정수형 데이터를 가져오려면 getIntExtra() 메서드를 호출
// => 파라미터 : 전달된 파라미터명, 데이터를 가져오지 못할 경우 설정할 기본값
int value = intent.getIntExtra("value", 0);
String name = intent.getStringExtra("name");
tvResult.setText("이름 : " + name + ", 값 : " + value);
Button btnReturn = findViewById(R.id.btnReturn);
btnReturn.setOnClickListener(new View.OnClickListener() {
@Override
public void onClick(View v) {
finish();
}
});
}
⇒
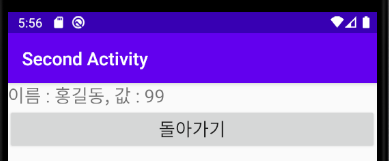
값이 전달됨
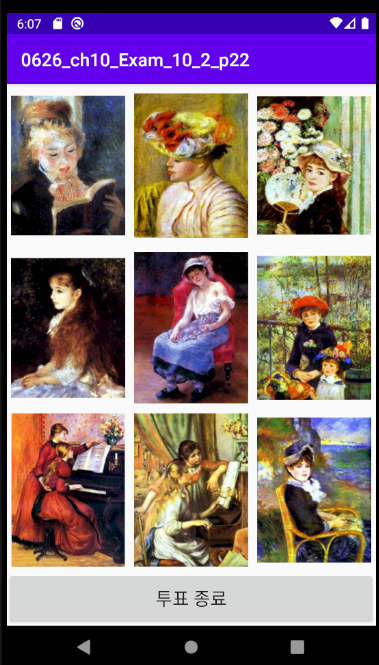
======== 0626_ch10_Exam_10_2_p22
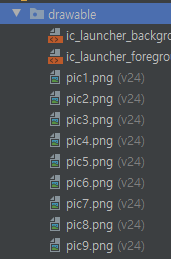
- res 폴더 안 drawable 폴더 안에 사진파일 9개 넣기
< activity_main.xml >
<?xml version="1.0" encoding="utf-8"?>
<LinearLayout xmlns:android="http://schemas.android.com/apk/res/android"
xmlns:app="http://schemas.android.com/apk/res-auto"
xmlns:tools="http://schemas.android.com/tools"
android:layout_width="match_parent"
android:layout_height="match_parent"
tools:context=".MainActivity"
android:orientation="vertical">
<LinearLayout
android:layout_width="match_parent"
android:layout_height="0dp"
android:layout_weight="3">
<ImageView
android:layout_width="0dp"
android:layout_height="wrap_content"
android:layout_weight="1"
android:layout_margin="5dp"
android:id="@+id/iv1"
android:src="@drawable/pic1"/>
<ImageView
android:layout_width="0dp"
android:layout_height="wrap_content"
android:layout_weight="1"
android:layout_margin="5dp"
android:id="@+id/iv2"
android:src="@drawable/pic2"/>
<ImageView
android:layout_width="0dp"
android:layout_height="wrap_content"
android:layout_weight="1"
android:layout_margin="5dp"
android:id="@+id/iv3"
android:src="@drawable/pic3"/>
</LinearLayout>
<LinearLayout
android:layout_width="match_parent"
android:layout_height="0dp"
android:layout_weight="3">
<ImageView
android:layout_width="0dp"
android:layout_height="wrap_content"
android:layout_weight="1"
android:layout_margin="5dp"
android:id="@+id/iv4"
android:src="@drawable/pic4"/>
<ImageView
android:layout_width="0dp"
android:layout_height="wrap_content"
android:layout_weight="1"
android:layout_margin="5dp"
android:id="@+id/iv5"
android:src="@drawable/pic5"/>
<ImageView
android:layout_width="0dp"
android:layout_height="wrap_content"
android:layout_weight="1"
android:layout_margin="5dp"
android:id="@+id/iv6"
android:src="@drawable/pic6"/>
</LinearLayout>
<LinearLayout
android:layout_width="match_parent"
android:layout_height="0dp"
android:layout_weight="3">
<ImageView
android:layout_width="0dp"
android:layout_height="wrap_content"
android:layout_weight="1"
android:layout_margin="5dp"
android:id="@+id/iv7"
android:src="@drawable/pic7"/>
<ImageView
android:layout_width="0dp"
android:layout_height="wrap_content"
android:layout_weight="1"
android:layout_margin="5dp"
android:id="@+id/iv8"
android:src="@drawable/pic8"/>
<ImageView
android:layout_width="0dp"
android:layout_height="wrap_content"
android:layout_weight="1"
android:layout_margin="5dp"
android:id="@+id/iv9"
android:src="@drawable/pic9"/>
</LinearLayout>
<Button
android:layout_width="match_parent"
android:layout_height="0dp"
android:layout_weight="1"
android:id="@+id/btnOk"
android:text="투표 종료"
android:textSize="20sp"/>
</LinearLayout>
< MainActivity.java >
package com.example.a0626_ch10_exam_10_2_p22;
import androidx.appcompat.app.AppCompatActivity;
import android.os.Bundle;
import android.view.View;
import android.widget.ImageView;
import android.widget.Toast;
public class MainActivity extends AppCompatActivity {
@Override
protected void onCreate(Bundle savedInstanceState) {
super.onCreate(savedInstanceState);
setContentView(R.layout.activity_main);
setTitle("선호도 투표");
// 투표 값을 저장할 정수형 배열 9개짜리 생성
final int[] voteCount = new int[9];
// 사진 9개를 하나의 배열로 관리하기 위해 ImageView 배열 9개짜리 생성
ImageView[] image = new ImageView[9];
// 각 사진의 ID 값을 저장하는 정수형 배열 생성하여 사진 ID 저장
int[] imageId = {
R.id.iv1, R.id.iv2, R.id.iv3, R.id.iv4, R.id.iv5,
R.id.iv6, R.id.iv7, R.id.iv8, R.id.iv9
};
// 각 사진의 이름을 저장하는 String 배열 생성하여 사진 이름 저장
final String[] imageName = {
"그림1", "그림2", "그림3", "그림4", "그림5",
"그림6", "그림7", "그림8", "그림9"
};
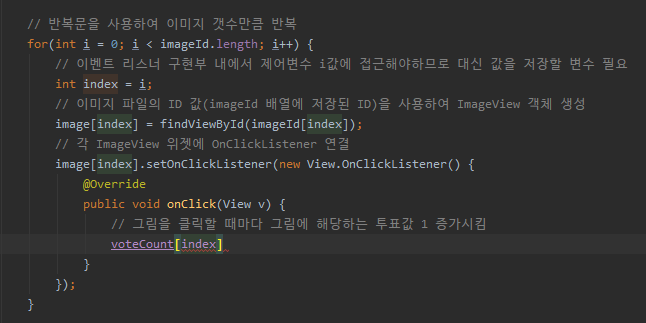
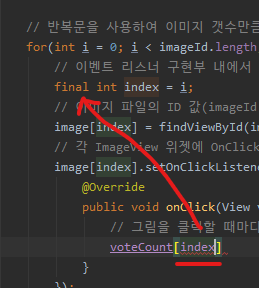
// 반복문을 사용하여 이미지 갯수만큼 반복
for(int i = 0; i < imageId.length; i++) {
// 이벤트 리스너 구현부 내에서 제어변수 i값에 접근해야하므로 대신 값을 저장할 변수 필요
final int index = i;
// 이미지 파일의 ID 값(imageId 배열에 저장된 ID)을 사용하여 ImageView 객체 생성
image[index] = findViewById(imageId[index]);
// 각 ImageView 위젯에 OnClickListener 연결
image[index].setOnClickListener(new View.OnClickListener() {
@Override
public void onClick(View v) {
// 그림을 클릭할 때마다 그림에 해당하는 투표값 1 증가시킴
voteCount[index]++;
Toast.makeText(MainActivity.this, imageName[index] + " : 총 " + voteCount[index] + "표", Toast.LENGTH_SHORT).show();
}
});
}
}
}
- 자동완성하면
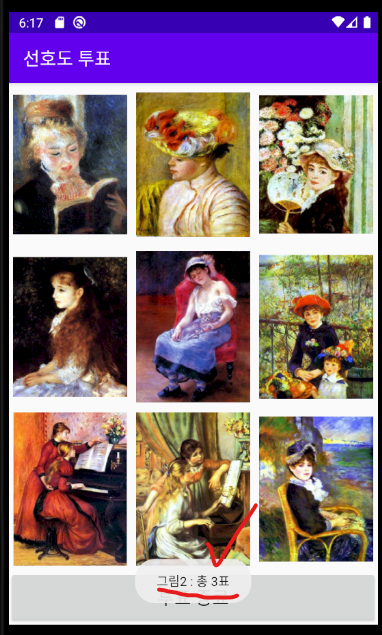
- 클릭할 때마다 증가 총 투표수
> 투표 종료 버튼 클릭 시 ResultActivity 액티비티 실행
======== ResultActivity.java
- ResultActivity 만들기 (AppCompatActivity 상속 받는)
< AndroidMainfest.xml >
<activity android:name=".ResultActivity" android:label="Result 액티비티"/>
- 추가
======== result_activity.xml
- result_activity.xml 파일 만들기
< MainActivity.java >
Button btnOk = findViewById(R.id.btnOk);
btnOk.setOnClickListener(new View.OnClickListener() {
@Override
public void onClick(View v) {
// 투표 종료 버튼 클릭 시 ResultActivity 액티비티 실행
// => 전달할 데이터 : 투표결과(voteCount), 그림파일명(imageName)
Intent intent = new Intent(getApplicationContext(), ResultActivity.class);
intent.putExtra("voteCount", voteCount);
intent.putExtra("imageName", imageName);
startActivity(intent);
}
});
- 버튼 클릭 이벤트
< ResultActivity.java>
package com.example.a0626_ch10_exam_10_2_p22;
import android.content.Intent;
import android.os.Bundle;
import android.util.Log;
import androidx.annotation.Nullable;
import androidx.appcompat.app.AppCompatActivity;
import java.util.logging.Level;
public class ResultActivity extends AppCompatActivity {
@Override
protected void onCreate(@Nullable Bundle savedInstanceState) {
super.onCreate(savedInstanceState);
setContentView(R.layout.result_activity);
// 전달된 투표 결과 가져오기
Intent intent = getIntent();
int[] voteResult = intent.getIntArrayExtra("voteCount");
String[] imageName = intent.getStringArrayExtra("imageName");
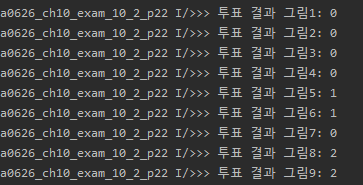
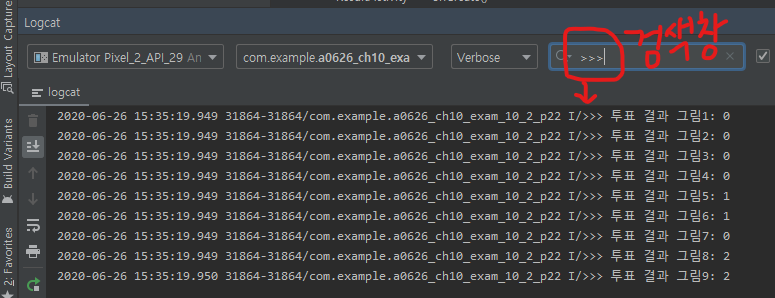
// 투표결과를 로그캣을 사용하여 출력해보기
// Log.i(">>> 투표 결과");
for(int i = 0; i < voteResult.length; i++) {
Log.i(">>> 투표 결과 " + imageName[i], voteResult[i]+"");
}
}
}
### tip Logcat
프로그램 화면 아래쪽에 있는

- 로그들 전부 확인가능!
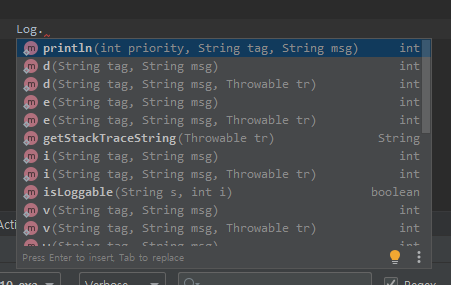
- 보통 i 를 많이 사용!
< result_activity.xml >
<?xml version="1.0" encoding="utf-8"?>
<LinearLayout
xmlns:android="http://schemas.android.com/apk/res/android"
android:layout_width="match_parent"
android:layout_height="match_parent"
android:orientation="vertical">
<LinearLayout
android:layout_width="match_parent"
android:layout_height="0dp"
android:layout_weight="1"
android:orientation="vertical"
android:gravity="center_horizontal">
<TextView
android:layout_width="wrap_content"
android:layout_height="wrap_content"
android:id="@+id/tvBest"
android:text="최다 득표 그림명"
android:textSize="20sp"/>
<ImageView
android:layout_width="wrap_content"
android:layout_height="wrap_content"
android:id="@+id/ivBest"/>
</LinearLayout>
<LinearLayout
android:layout_width="match_parent"
android:layout_height="0dp"
android:layout_weight="1"
android:orientation="vertical">
</LinearLayout>
</LinearLayout>
< ResultActivity.java >
package com.example.a0626_ch10_exam_10_2_p22;
import android.content.Intent;
import android.os.Bundle;
import android.util.Log;
import android.widget.ImageView;
import android.widget.TextView;
import androidx.annotation.Nullable;
import androidx.appcompat.app.AppCompatActivity;
import java.util.logging.Level;
public class ResultActivity extends AppCompatActivity {
TextView tvBest;
ImageView ivBest;
@Override
protected void onCreate(@Nullable Bundle savedInstanceState) {
super.onCreate(savedInstanceState);
setContentView(R.layout.result_activity);
tvBest = findViewById(R.id.tvBest);
ivBest = findViewById(R.id.ivBest);
// 그림파일 ID 9개 가져오기
int[] imageId = {
R.drawable.pic1, R.drawable.pic2, R.drawable.pic3, R.drawable.pic4, R.drawable.pic5,
R.drawable.pic6, R.drawable.pic7, R.drawable.pic8, R.drawable.pic9
};
// 전달된 투표 결과 가져오기
Intent intent = getIntent();
int[] voteResult = intent.getIntArrayExtra("voteCount");
String[] imageName = intent.getStringArrayExtra("imageName");
int bestVoteIndex = 0, bestVoteCount = 0;
// 투표결과를 LogCat을 사용하여 출력해보기
// Log.i(">>> 투표 결과");
for(int i = 0; i < voteResult.length; i++) {
// Log.i(">>> 투표 결과 " + imageName[i], voteResult[i]+"");
// 최다 득표 그림에 대한 인덱스를 저장
if(bestVoteCount < voteResult[i]) {
bestVoteCount = voteResult[i]; // 최다 득표수 저장
bestVoteIndex = i; // 최다득표 그림 인덱스 저장
}
}
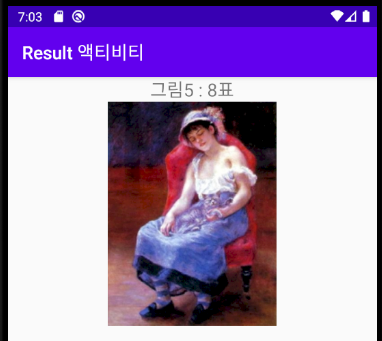
// TextView 위젯에 최다득표 그림명 및 투표수 출력
tvBest.setText(imageName[bestVoteIndex] + " : " + bestVoteCount + "표");
// ImageView 위젯에 최다득표 그림 파일 출력
ivBest.setImageResource(imageId[bestVoteIndex]);
}
}
======== 0626_ch10_p37
< activity_main.xml >
<?xml version="1.0" encoding="utf-8"?>
<LinearLayout xmlns:android="http://schemas.android.com/apk/res/android"
xmlns:app="http://schemas.android.com/apk/res-auto"
xmlns:tools="http://schemas.android.com/tools"
android:layout_width="match_parent"
android:layout_height="match_parent"
tools:context=".MainActivity"
android:orientation="vertical">
<EditText
android:layout_width="match_parent"
android:layout_height="wrap_content"
android:id="@+id/etNum1"
android:textSize="20sp"/>
<EditText
android:layout_width="match_parent"
android:layout_height="wrap_content"
android:id="@+id/etNum2"
android:textSize="20sp"/>
<Button
android:layout_width="match_parent"
android:layout_height="wrap_content"
android:id="@+id/btnNewActivity"
android:text="덧셈 계산"
android:textSize="20sp"/>
</LinearLayout>
< second_activity.xml >
<?xml version="1.0" encoding="utf-8"?>
<LinearLayout
xmlns:android="http://schemas.android.com/apk/res/android"
android:layout_width="match_parent"
android:layout_height="match_parent"
android:orientation="vertical">
<Button
android:layout_width="match_parent"
android:layout_height="wrap_content"
android:id="@+id/btnReturn"
android:text="돌아가기"
android:textSize="20sp" />
</LinearLayout>
< MainActivity.java >
package com.example.a0626_ch10_p37;
import androidx.appcompat.app.AppCompatActivity;
import android.content.Intent;
import android.os.Bundle;
import android.view.View;
import android.widget.Button;
import android.widget.EditText;
public class MainActivity extends AppCompatActivity {
EditText etNum1, etNum2;
Button btnNewActivity;
@Override
protected void onCreate(Bundle savedInstanceState) {
super.onCreate(savedInstanceState);
setContentView(R.layout.activity_main);
etNum1 = findViewById(R.id.etNum1);
etNum2 = findViewById(R.id.etNum2);
btnNewActivity = findViewById(R.id.btnNewActivity);
btnNewActivity.setOnClickListener(new View.OnClickListener() {
@Override
public void onClick(View v) {
Intent intent = new Intent(MainActivity.this, SecondActivity.class);
intent.putExtra("num1", Integer.parseInt(etNum1.getText().toString()));
intent.putExtra("num2", Integer.parseInt(etNum2.getText().toString()));
// 리턴값을 받기 위해서는 startActivityForResult() 메서드를 호출해야한다.
// => 전달할 Intent 객체와 함께 ResultCode 전달(리턴값이 있을 경우 0 이상의 값 사용)
startActivityForResult(intent, 0);
}
});
}
}
< SecondActivity.java >
package com.example.a0626_ch10_p37;
import android.content.Intent;
import android.os.Bundle;
import android.view.View;
import android.widget.Button;
import androidx.annotation.Nullable;
import androidx.appcompat.app.AppCompatActivity;
public class SecondActivity extends AppCompatActivity {
Button btnReturn;
@Override
protected void onCreate(@Nullable Bundle savedInstanceState) {
super.onCreate(savedInstanceState);
setContentView(R.layout.second_activity); // second_activity.xml 파일 표시
btnReturn = findViewById(R.id.btnReturn);
btnReturn.setOnClickListener(new View.OnClickListener() {
@Override
public void onClick(View v) {
finish();
}
});
}
}
- 자동완성 하면 자동으로 final 됨
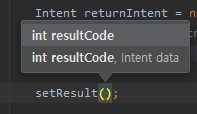
- resultCode 가 꼭 들어가야함
< SecondActivity.java >
public class SecondActivity extends AppCompatActivity {
Button btnReturn;
@Override
protected void onCreate(@Nullable Bundle savedInstanceState) {
super.onCreate(savedInstanceState);
setContentView(R.layout.second_activity); // second_activity.xml 파일 표시
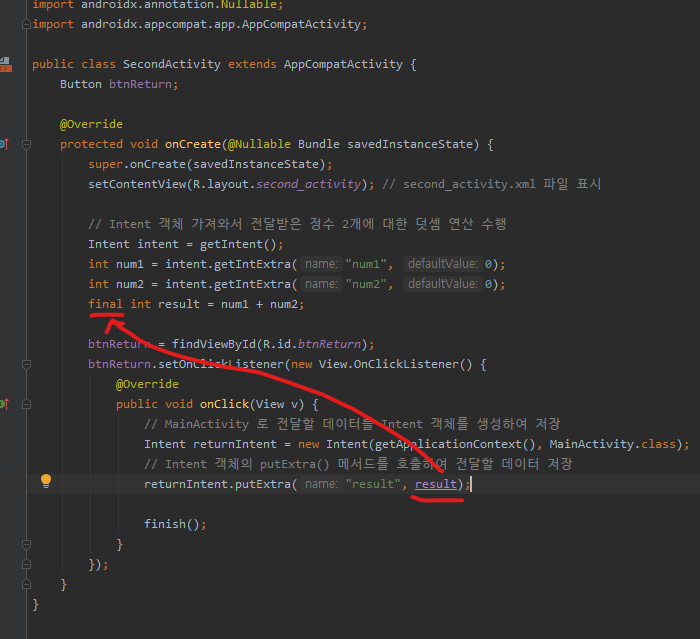
// Intent 객체 가져와서 전달받은 정수 2개에 대한 덧셈 연산 수행
Intent intent = getIntent();
int num1 = intent.getIntExtra("num1", 0);
int num2 = intent.getIntExtra("num2", 0);
final int result = num1 + num2;
btnReturn = findViewById(R.id.btnReturn);
btnReturn.setOnClickListener(new View.OnClickListener() {
@Override
public void onClick(View v) {
// MainActivity 로 전달할 데이터를 Intent 객체를 생성하여 저장
Intent returnIntent = new Intent(getApplicationContext(), MainActivity.class);
// Intent 객체의 putExtra() 메서드를 호출하여 전달할 데이터 저장
returnIntent.putExtra("result", result);
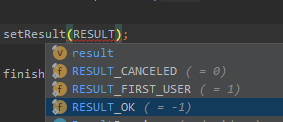
// 리턴할 때 전달할 Intent 객체를 setResult() 메서드에 전달
// => 파라미터 : 응답 코드(상수)와 Intent 객체
setResult(RESULT_OK, returnIntent);
finish();
}
});
}
}
< MainActivity.java >
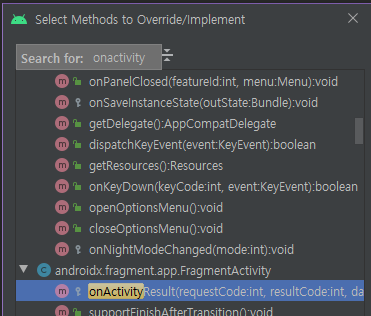
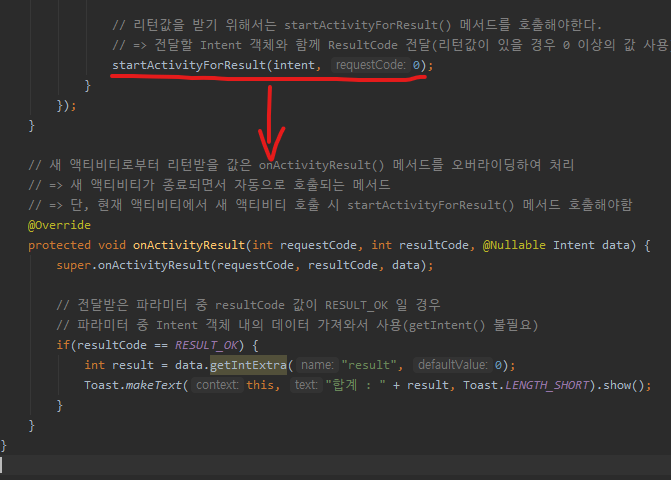
// 새 액티비티로부터 리턴받을 값은 onActivityResult() 메서드를 오버라이딩하여 처리
// => 새 액티비티가 종료되면서 자동으로 호출되는 메서드
// => 단, 현재 액티비티에서 새 액티비티 호출 시 startActivityForResult() 메서드 호출해야함
@Override
protected void onActivityResult(int requestCode, int resultCode, @Nullable Intent data) {
super.onActivityResult(requestCode, resultCode, data);
// 전달받은 파라미터 중 resultCode 값이 RESULT_OK 일 경우
// 파라미터 중 Intent 객체 내의 데이터 가져와서 사용(getIntent() 불필요)
if(resultCode == RESULT_OK) {
int result = data.getIntExtra("result", 0);
Toast.makeText(this, "합계 : " + result, Toast.LENGTH_SHORT).show();
}
}
}
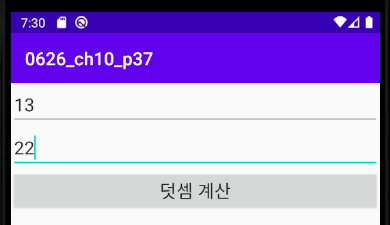

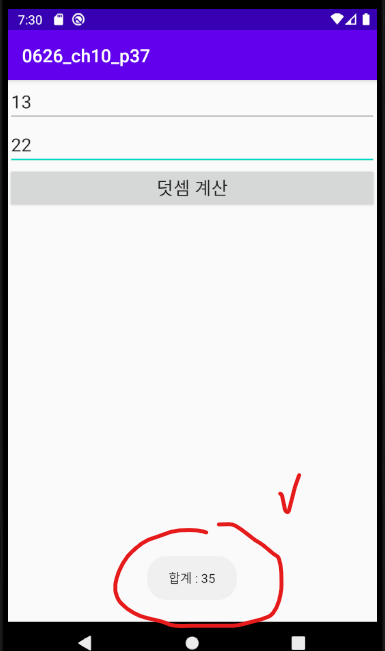
- 돌아가기 클릭 시 값을 가지고 돌아옴!
======== 0626_ch10_implicit_Intent_p44
<?xml version="1.0" encoding="utf-8"?>
<LinearLayout xmlns:android="http://schemas.android.com/apk/res/android"
xmlns:app="http://schemas.android.com/apk/res-auto"
xmlns:tools="http://schemas.android.com/tools"
android:layout_width="match_parent"
android:layout_height="match_parent"
tools:context=".MainActivity"
android:orientation="vertical">
<Button
android:layout_width="match_parent"
android:layout_height="wrap_content"
android:text="전화 걸기"
android:textSize="20sp"
android:id="@+id/btnDial"/>
<Button
android:layout_width="match_parent"
android:layout_height="wrap_content"
android:text="홈페이지 열기"
android:textSize="20sp"
android:id="@+id/btnWeb"/>
<Button
android:layout_width="match_parent"
android:layout_height="wrap_content"
android:text="구글 맵 열기"
android:textSize="20sp"
android:id="@+id/btnGoogle"/>
<Button
android:layout_width="match_parent"
android:layout_height="wrap_content"
android:text="구글 검색하기"
android:textSize="20sp"
android:id="@+id/btnSearch"/>
<Button
android:layout_width="match_parent"
android:layout_height="wrap_content"
android:text="문자 보내기"
android:textSize="20sp"
android:id="@+id/btnSms"/>
<Button
android:layout_width="match_parent"
android:layout_height="wrap_content"
android:text="사진 찍기"
android:textSize="20sp"
android:id="@+id/btnPhoto"/>
</LinearLayout>
< MainActivity.java >
package com.example.a0626_ch10_implicit_intent_p44;
import androidx.appcompat.app.AppCompatActivity;
import android.os.Bundle;
import android.widget.Button;
public class MainActivity extends AppCompatActivity {
Button btnDial, btnWeb, btnGoogle, btnSearch, btnSms, btnPhoto;
@Override
protected void onCreate(Bundle savedInstanceState) {
super.onCreate(savedInstanceState);
setContentView(R.layout.activity_main);
setTitle("암시적 인텐트 예제 p44");
btnDial = findViewById(R.id.btnDial);
btnWeb = findViewById(R.id.btnWeb);
btnGoogle = findViewById(R.id.btnGoogle);
btnSearch = findViewById(R.id.btnSearch);
btnSms = findViewById(R.id.btnSms);
btnPhoto = findViewById(R.id.btnPhoto);
}
}
btnDial.setOnClickListener(new View.OnClickListener() {
@Override
public void onClick(View v) {
// 전화걸기 버튼 클릭 시 전화앱 실행하여 입력된 전화번호를 전달하여 준비작업 수행
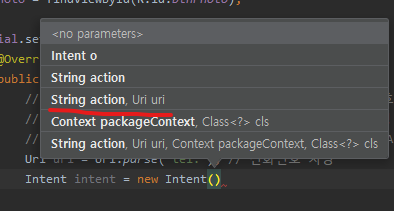
// => Uri.parse("tel:전화번호") 형식으로 Uri 객체 생성
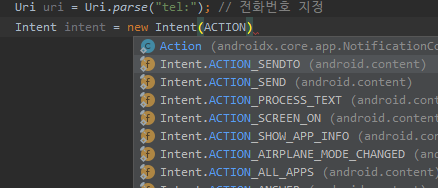
// => Intent 객체 생성 시 파라미터로 Intent.ACTION_DIAL, Uri 객체를 전달
Uri uri = Uri.parse("tel:"); // 전화번호 지정
Intent intent = new Intent(Intent.ACTION_DIAL, uri);
startActivity(intent);
}
});
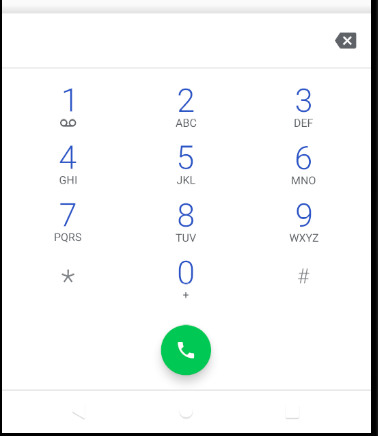
- 전화 걸기 클릭 시 전화창 뜸
btnWeb.setOnClickListener(new View.OnClickListener() {
@Override
public void onClick(View v) {
// 홈페이지 열기 버튼 클릭 시 웹브라우저 실행하여 입력된 주소로 웹 접속 수행
// => Uri.parse("http://도메인네임") 형식으로 Uri 객체 생성
// => Intent 객체 생성 시 파라미터로 Intent.ACTION_VIEW, Uri 객체를 전달
// => 기존 웹브라우저 사용 시 별도의 권한이 필요없으나, WebView 위젯 사용 시 권한 설정 필요
Uri uri = Uri.parse("http://www.itwillbs.co.kr");
Intent intent = new Intent(Intent.ACTION_VIEW, uri);
startActivity(intent);
}
});
- 아이티윌 홈페이지 화면 나옴
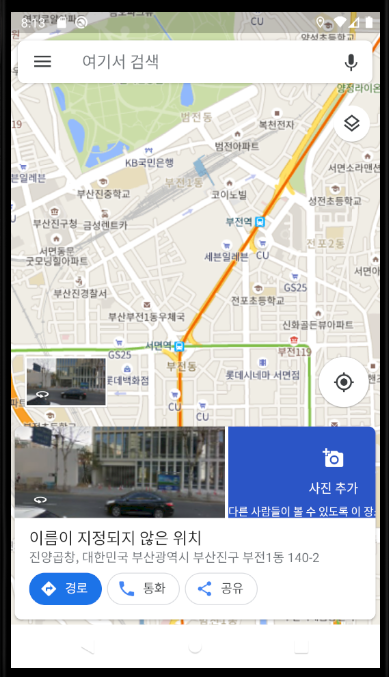
btnGoogle.setOnClickListener(new View.OnClickListener() {
@Override
public void onClick(View v) {
// 위도 : 35.1584207, 경도 : 129.0598827
// 구글맵에 특정 위치를 표시하기 위해 위도, 경도값 전달
// => "http://maps.google.com/maps?q=위도,경도" 형태로 Uri 객체 생성
double latitude = 35.1584207;
double longitude = 129.0598827;
Uri uri = Uri.parse("http://maps.google.com/maps?q=" + latitude + "," + longitude);
// Intent 객체를 생성하여 ACTION_VIEW 상수, URI 객체 전달
Intent intent = new Intent(Intent.ACTION_VIEW, uri);
startActivity(intent);
}
});
< AndroidManifests.xml >
<!-- 지도 사용을 위해 ACCESS_COARSE_LOCATION 과 ACCESS_FINE_LOCATION 권한 필요 -->
<uses-permission android:name="android.permission.ACCESS_COARSE_LOCATION"/>
<uses-permission android:name="android.permission.ACCESS_FINE_LOCATION"/>
- 추가
btnSearch.setOnClickListener(new View.OnClickListener() {
@Override
public void onClick(View v) {
// 검색어를 사용하여 구글 검색 활용하려면
// Intent 객체 생성 시 ACTION_WEB_SEARCH 상수 전달
Intent intent = new Intent(Intent.ACTION_WEB_SEARCH);
// 검색어를 Intent 객체의 putExtra() 메서드로 전달
// => 파라미터 : SearchManager.QUERY 상수, 검색어
intent.putExtra(SearchManager.QUERY, "아이티윌 부산교육센터");
startActivity(intent);
}
});
- 찾기
btnSms.setOnClickListener(new View.OnClickListener() {
@Override
public void onClick(View v) {
// 문자메세지 앱 실행을 위해 Intent 객체 생성 시 ACTION_SENDTO 상수 전달
Intent intent = new Intent(Intent.ACTION_SENDTO);
// putExtra() 메서드를 호출하여 "sms_body" 문자열과 전송할 문자메세지 본문 전달
intent.putExtra("sms_body", "문자메세지입니다");
// Intent 객체의 setData() 메서드를 호출하여 Uri 객체 전달
// => Uri 객체 생성 시 "smsto:" 문자열 뒤에 인코딩 된 전화번호 연결하여 전달
Uri uri = Uri.parse("smsto:" + Uri.encode("010-1234-5678"));
intent.setData(uri);
startActivity(intent);
}
});
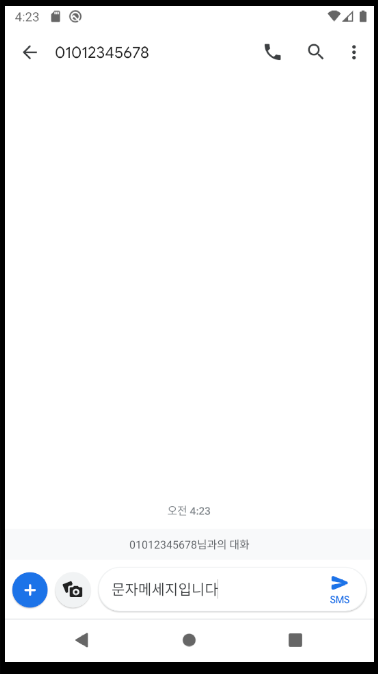
- 문자는 연결할 일 별로 없음!
- 카카오톡이나 이메일 연결을 많이 한다
btnPhoto.setOnClickListener(new View.OnClickListener() {
@Override
public void onClick(View v) {
// 카메라 앱을 실행하기 위해서 Intent 객체를 생성하여
// 파라미터로 MediaStore.ACTION_IMAGE_CAPTURE 상수 전달
Intent intent = new Intent(MediaStore.ACTION_IMAGE_CAPTURE);
startActivity(intent);
}
});
- 사진 촬영
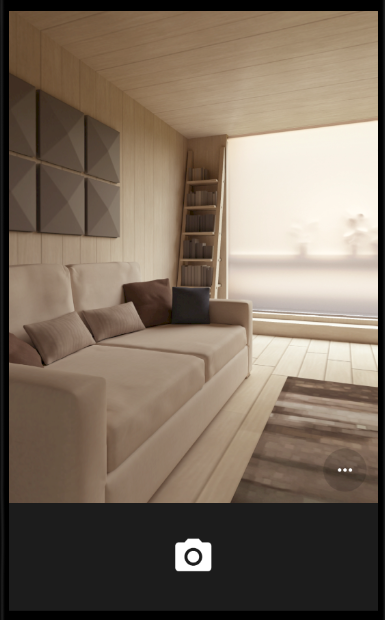
- alt + 움직이면 카메라 움직임
'Dev.Program > Android' 카테고리의 다른 글
| Spinner / SQLite (0) | 2022.10.10 |
|---|---|
| logcat / ListView (0) | 2022.10.10 |
| Fragment / 메뉴와 대화상자 / Context_Menu / Toast (0) | 2022.10.10 |
| ScrollView / SlidingDrawer / ViewFlipper / WebView (0) | 2022.10.10 |
| TextView / ProgressBar / SeekBar / RatingBar (0) | 2022.10.10 |