2022. 10. 10. 15:55ㆍDev.Program/Android
< 안드로이드 >
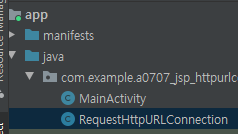
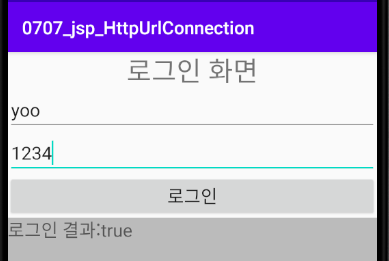
======== 0707_jsp_HttpUrlConnection
> 이클립스 켜서 MVC2 켜보기
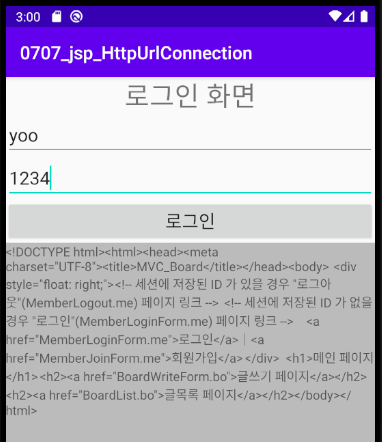
http://localhost:8080/MVC_Board/MemberLoginForm.me
여기서 로그인되는지 확인해보기
< activity_main.xml >
<?xml version="1.0" encoding="utf-8"?>
<LinearLayout xmlns:android="http://schemas.android.com/apk/res/android"
xmlns:app="http://schemas.android.com/apk/res-auto"
xmlns:tools="http://schemas.android.com/tools"
android:layout_width="match_parent"
android:layout_height="match_parent"
tools:context=".MainActivity"
android:orientation="vertical">
<TextView
android:layout_width="match_parent"
android:layout_height="wrap_content"
android:text="로그인 화면"
android:textSize="30sp"
android:gravity="center"/>
<EditText
android:layout_width="match_parent"
android:layout_height="wrap_content"
android:id="@+id/etId"
android:hint="ID 를 입력하세요"
android:textSize="20sp"
android:singleLine="true"/>
<EditText
android:layout_width="match_parent"
android:layout_height="wrap_content"
android:id="@+id/etPw"
android:hint="Password 를 입력하세요"
android:textSize="20sp"
android:singleLine="true"/>
<Button
android:layout_width="match_parent"
android:layout_height="wrap_content"
android:id="@+id/btnLogin"
android:text="로그인"
android:textSize="20sp"/>
<TextView
android:layout_width="match_parent"
android:layout_height="match_parent"
android:id="@+id/tvResult"
android:background="#BBBBBB"/>
</LinearLayout>
< MainActivity.java >
package com.example.a0707_jsp_httpurlconnection;
import androidx.appcompat.app.AppCompatActivity;
import android.content.ContentValues;
import android.os.AsyncTask;
import android.os.Bundle;
import android.view.View;
import android.widget.Button;
import android.widget.EditText;
import android.widget.Toast;
public class MainActivity extends AppCompatActivity {
EditText etId, etPw;
Button btnLogin;
@Override
protected void onCreate(Bundle savedInstanceState) {
super.onCreate(savedInstanceState);
setContentView(R.layout.activity_main);
etId = findViewById(R.id.etId);
etPw = findViewById(R.id.etPw);
btnLogin = findViewById(R.id.btnLogin);
btnLogin.setOnClickListener(new View.OnClickListener() {
@Override
public void onClick(View v) {
// ID 가 입력되지 않으면, 경고메세지 띄우고 ID 입력창에 커서 요청
if(etId.length() == 0) {
Toast.makeText(MainActivity.this, "아이디를 입력하세요", Toast.LENGTH_SHORT).show();
etId.requestFocus();
return;
} else if(etPw.length() == 0) {
Toast.makeText(MainActivity.this, "패스워드를 입력하세요", Toast.LENGTH_SHORT).show();
etPw.requestFocus();
return;
}
String id = etId.getText().toString();
String password = etPw.getText().toString();
Toast.makeText(MainActivity.this, id +", "+ password, Toast.LENGTH_SHORT).show();
// ID, Password 를 전달하여 로그인 요청을 수행할 페이지의 URL 지정
String url = "http://192.168.1.4/MVC_Board/MemberLoginPro.me";
// 해당 페이지(URL) 요청 시 전달할 데이터(파라미터)를 ContentValues 객체 생성 후
// put() 메서드를 사용하여 파라미터명, 데이터를 전달 = Map 객체와 동일한 구조
ContentValues cv = new ContentValues(); // request.setParameter() or request.setAttribute() 와 비슷
cv.put("id", id); // Map(키, 밸류)과 비슷
cv.put("passwd", password);
}
});
}
// HTTP 요청을 위해 백그라운드 작업으로 처리할 코드들을
// AsyncTask 클래스를 상속받응 서브클래스를 정의하여 기술
class NetworkTask extends AsyncTask<Void, Void, String> {
// AsyncTask 클래스를 상속받은 뒤 doInBackground() 메서드 오버라이딩 필수!
private String url; // HTTP 요청에 사용될 URL
private ContentValues cv; // HTTP 요청 시 전달할 데이터가 저장된 객체체
// 생성자를 통해 URL 과 데이터 저장 객체 전달받음
public NetworkTask(String url, ContentValues cv) {
this.url = url;
this.cv = cv;
}
@Override
protected String doInBackground(Void... voids) {
// 백그라운드에서 처리할 작업들을 기술
// HTTP 접속 요청을 처리할 객체를 생성하여, URL 과 데이터를 파라미터로 전달하여
// 처리된 결과를 다시 리턴받아 해당 결과에 대한 처리 수행
return null;
}
}
} // MainActivity 끝
>>>>>>>> RequestHttpURLConnection.java
- Ctrl + Alt + T : try~catch
< Manifest.xml >
<?xml version="1.0" encoding="utf-8"?>
<manifest xmlns:android="http://schemas.android.com/apk/res/android"
package="com.example.a0707_jsp_httpurlconnection">
<application
android:allowBackup="true"
android:icon="@mipmap/ic_launcher"
android:label="@string/app_name"
android:roundIcon="@mipmap/ic_launcher_round"
android:supportsRtl="true"
android:theme="@style/AppTheme"
android:usesCleartextTraffic="true">
<activity android:name=".MainActivity">
<intent-filter>
<action android:name="android.intent.action.MAIN" />
<category android:name="android.intent.category.LAUNCHER" />
</intent-filter>
</activity>
<uses-library android:name="org.apache.http.legacy" android:required="false"/>
</application>
<uses-permission android:name="android.permission.INTERNET"/>
</manifest>
< RequestHttpURLConnection.java >
package com.example.a0707_jsp_httpurlconnection;
import android.content.ContentValues;
import android.util.Log;
import android.widget.Toast;
import java.io.BufferedReader;
import java.io.IOException;
import java.io.InputStreamReader;
import java.io.OutputStream;
import java.net.HttpURLConnection;
import java.net.MalformedURLException;
import java.net.URL;
import java.util.Map;
public class RequestHttpURLConnection {
// URL 과 전달할 데이터(ContentValues)를 전달받아
// HttpURLConnection 객체를 통해 HTTP 통신 연결 후 데이터 전송 작업 수행
public String request(String strUrl, ContentValues cv) {
// HTTP 통신에 사용할 HttpURLConnection 타입 변수 선언 => 요청에 사용될 URL 연결 객체 저장
HttpURLConnection con = null;
// URL 뒤에 파라미터 형식으로 붙여서 전달할 데이터를 StringBuffer 객체로 생성
StringBuffer sb = new StringBuffer();
// 만약, 전달할 데이터(ContentValues 객체)가 없을 경우 파라미터를 널스트링("")으로 설정
if(cv == null) {
sb.append("");
} else {
// 전달할 데이터(ContentValues 객체)가 있을 경우
// 파라미터 갯수를 구분하기 위해 boolean 타입 변수 선언하여 모든 스위칭 용으로 사용
boolean isNextParam = false; // 파라미터가 1개일 경우 false, 2개 이상일 경우 true
// 파라미터로 전달될 데이터(ContentValues 객체)의 key, value 를 저장할 변수 2개 선언
String key, value;
// ContentValues 객체로부터 저장된 데이터 꺼내서 반복문을 통해 변수에 각각 저장
// => ContentValues 객체의 valueSet() 메서드를 호출하면 Map.Entry 타입 객체(키, 값) 리턴됨
// => Map.Entry 타입 변수는 제네릭 타입을 키는 String, 값은 Object 로 지정
for(Map.Entry<String, Object> map : cv.valueSet()) {
// Map 객체의 키, 값을 각각 가져와서 String 타입 변수에 저장
key = map.getKey(); // 파라미터 이름 가져오기
value = map.getValue().toString(); // 데이터 가져오기(오브젝트 타입이라 형변환 필요)
// 만약, isNextParam(다음 파라미터 존재여부)가 true 이면
// StringBuffer 객체에 파라미터 연결 문자인 "&" 를 추가
if(isNextParam) {
sb.append("&");
}
// 전달받은 파라미터(id, password)를 결합하여 StringBuffer 객체에 추가
// key=value 형식으로 문자열 결합 필요
// sb.append(key);
// sb.append("=");
// sb.append(value);
// => 빌더 패턴을 활용하여 append() 메서드를 연속적으로 연결 가능
sb.append(key).append("=").append(value);
// 파라미터가 2개 이상일 경우 isNextParam 변수를 true 로 변경하고
// 다음 반복때부터 & 기호를 붙일 수 있도록 해야함
if(!isNextParam) {
if(cv.size() >= 2) { // ContentValues 객체에 저장된 요소가 2개 이상일 경우
isNextParam = true; // 다음 파라미터 존재 여부를 true 로 변경
// => 어차피 반복 횟수가 정해져있으므로 true 로 변경 이후에는 별도 변경 X
// (마지막 파라미터 문자열 결합 후에는 & 기호가 붙지 않는다)
}
}
}
}
// HTTPURLConnection 객체를 통해 해당 URL 에 접속을 시도하여 연결 작업 수행 및 데이터 전달
OutputStream os = null;
BufferedReader buffer = null;
try {
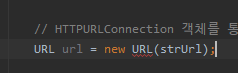
URL url = new URL(strUrl); // URL 객체를 생성하여 생성자에 접속 URL 전달
/*
안드로이드 9.0(PIE)부터 보안상의 이유로 URL 주소를 문자열로 직접 전달하지 못함(HTTP 때문)
강제로 문자열 주소를 사용하려면 AndroidManifest.xml 파일에 다음 내용 추가
=> <Application> 태그의 속성에 android:usesCleartextTraffic="true" 추가
HTTP 통신을 위해서 AndroidManifest.xml 파일에 다음 라이브러리 추가
=> <activity> 태그 바깥에
<uses-library android:name="org.apache.http.legacy" android:required="false"/> 추가
*/
// URL 객체의 openConnection() 메서드를 호출하여 URL 연결 시도
// => 연결되면 HTTPURLConnection 객체가 리턴됨
con = (HttpURLConnection) url.openConnection(); // URLConnection -> HttpURLConnection 형변환
// HTTP 연결 객체인 HttpURLConnection 객체를 통해 데이터 전달 준비비
// => setXXX() 메서드를 사용하여 각종 설정 수행
con.setRequestMethod("POST");
// 전달할 데이터들의 캐릭터셋 설정
con.setRequestProperty("Accept-Charset", "UTF-8");
con.setRequestProperty("Context_type", "application/x-www-form-urlencoded;charset=UTF-8");
// 파라미터로 전달할 데이터(StringBuffer)를 String 타입으로 저장
String strParams = sb.toString();
// 데이터 전송을 위한 출력스트림 가져오기
os = con.getOutputStream();
// OutputStream 객체의 write() 메서드를 호출하여 데이터 출력
// => String 타입을 byte[] 타입으로 변환해야하므로 getBytes() 메서드 호출
// (이 때, 문자 데이터의 charset 을 UTF-8 방식으로 지정)
os.write(strParams.getBytes("UTF-8"));
os.flush(); // 출력 버퍼 모두 비우기
// 요청에 대한 결과 확인을 위해 HttpURLConnection 객체의
// getResponseCode() 메서드를 호출하여 결과 코드 확인
// => 결과 코드는 HttpURLConnection 의 상수를 사용
if(con.getResponseCode() != HttpURLConnection.HTTP_OK) {
// 정상이 아닐경우 null 값 리턴(실제로는 특정 상황에 대한 메세지 표시)
Log.i("HTTP Result Code : ", con.getResponseCode() + "");
return null;
}
// -------------------------------------------------
// HTTP 연결 요청 처리 후 리턴되는 결과값 처리
// 입력 스트림을 사용하여 리턴되는 결과값을 읽어오기
// => 데코레이션 패턴을 사용하여 BufferedReader 객체로 변환(String 타입 처리)
buffer = new BufferedReader(new InputStreamReader(con.getInputStream(), "UTF-8"));
String line, page = "";
line = buffer.readLine(); // 리턴값 한 줄 읽어오기
while (line != null) { // 읽어온 라인이 null 이 아닐 경우
// 읽어온 라인을 page 에 결합하고 새 라인 읽어오기
page += line;
line = buffer.readLine();
}
return page; // 최종 결합된 정보(page)를 리턴턴
}catch (MalformedURLException e) {
e.printStackTrace();
} catch (IOException e) {
e.printStackTrace();
} finally {
// 자원 반환
if(os != null) try { os.close(); } catch (Exception e) {e.printStackTrace();}
if(buffer != null) try { buffer.close(); } catch (Exception e) {e.printStackTrace();}
if(con != null) con.disconnect(); // 접속 해제
}
return null;
}
}
< MainActivity.java >
package com.example.a0707_jsp_httpurlconnection;
import androidx.appcompat.app.AppCompatActivity;
import android.content.ContentValues;
import android.os.AsyncTask;
import android.os.Bundle;
import android.view.View;
import android.widget.Button;
import android.widget.EditText;
import android.widget.TextView;
import android.widget.Toast;
public class MainActivity extends AppCompatActivity {
EditText etId, etPw;
Button btnLogin;
TextView tvResult;
@Override
protected void onCreate(Bundle savedInstanceState) {
super.onCreate(savedInstanceState);
setContentView(R.layout.activity_main);
etId = findViewById(R.id.etId);
etPw = findViewById(R.id.etPw);
btnLogin = findViewById(R.id.btnLogin);
tvResult = findViewById(R.id.tvResult);
btnLogin.setOnClickListener(new View.OnClickListener() {
@Override
public void onClick(View v) {
// ID 가 입력되지 않으면, 경고메세지 띄우고 ID 입력창에 커서 요청
if(etId.length() == 0) {
Toast.makeText(MainActivity.this, "아이디를 입력하세요", Toast.LENGTH_SHORT).show();
etId.requestFocus();
return;
} else if(etPw.length() == 0) {
Toast.makeText(MainActivity.this, "패스워드를 입력하세요", Toast.LENGTH_SHORT).show();
etPw.requestFocus();
return;
}
String id = etId.getText().toString();
String password = etPw.getText().toString();
Toast.makeText(MainActivity.this, id +", "+ password, Toast.LENGTH_SHORT).show();
// ID, Password 를 전달하여 로그인 요청을 수행할 페이지의 URL 지정
String url = "http://192.168.1.4:8080/MVC_Board/MemberLoginPro.me";
// 해당 페이지(URL) 요청 시 전달할 데이터(파라미터)를 ContentValues 객체 생성 후
// put() 메서드를 사용하여 파라미터명, 데이터를 전달 = Map 객체와 동일한 구조
ContentValues cv = new ContentValues(); // request.setParameter() or request.setAttribute() 와 비슷
cv.put("id", id); // Map(키, 밸류)과 비슷
cv.put("passwd", password);
// 백그라운드 작업을 위해 AsyncTask 클래스를 상속받아 정의한
// 서브클래스 인스턴스 생성
NetworkTask backgroundTask = new NetworkTask(url, cv);
// doInBackground() 메서드에 백그라운드 작업이 기술되어 있지만
// 직접 호출을 수행하지 않고, execute() 메서드를 호출하여 간접 실행 = Thread() 처리방식(run() 메서드에 쭉 적고 호출은 start()로 함)
backgroundTask.execute();
}
});
}
// HTTP 요청을 위해 백그라운드 작업으로 처리할 코드들을
// AsyncTask 클래스를 상속받응 서브클래스를 정의하여 기술
class NetworkTask extends AsyncTask<Void, Void, String> {
// AsyncTask 클래스를 상속받은 뒤 doInBackground() 메서드 오버라이딩 필수!
private String url; // HTTP 요청에 사용될 URL
private ContentValues cv; // HTTP 요청 시 전달할 데이터가 저장된 객체체
// 생성자를 통해 URL 과 데이터 저장 객체 전달받음
public NetworkTask(String url, ContentValues cv) {
this.url = url;
this.cv = cv;
}
@Override
protected String doInBackground(Void... voids) { // 자동으로 호출되는 메서드
// 백그라운드에서 처리할 작업들을 기술
// HTTP 접속 요청을 처리할 객체를 생성하여, URL 과 데이터를 파라미터로 전달하여
// 처리된 결과를 다시 리턴받아 해당 결과에 대한 처리 수행
RequestHttpURLConnection con = new RequestHttpURLConnection();
// => request() 메서드를 호출하여 URL, 데이터 전달하고, 리턴결과를 String 타입으로 저장
String result = con.request(url, cv);
return result; // 리턴결과 문자열을 다시 리턴
}
// doInBackground() 메서드가 끝나면 자동으로 onPostExecute() 메서드가 호출됨
// => doInBackground() 메서드에서 리턴한 값을 전달받아 처리 가능
@Override
protected void onPostExecute(String s) {
super.onPostExecute(s);
// 결과값을 TextView 에 출력
tvResult.setText(s);
}
}
} // MainActivity 끝
- 화면 안뜰경우 앱설치삭제 한 뒤 다시실행해보기
>>>>>>>> 이클립스로
< MemberLoginProAction,java >
| try { boolean isMember = memberLoginProService.isLoginMember(id, passwd); // ---------------------------------------------------------- // 안드로이드에서 로그인 했을 때 결과처리를 위한 코드 if(request.getParameter("loginType") != null) { String loginType = request.getParameter("loginType"); if(loginType.equals("M")) { // 모바일 로그인일 경우 // 로그인 결과(isMember)를 request 객체에 저장 request.setAttribute("loginResult", isMember); // Dispatcher 방식으로 // member 폴더의 mobile_login_result.jsp 페이지 이동 forward = new ActionForward(); forward.setPath("/member/mobile_login_result.jsp"); } // ---------------------------------------------------------- // LoginException 예외가 발생하지 않으면 로그인 성공 처리 } else if(isMember) { // 세션 객체를 사용하여 로그인에 성공한 아이디를 저장 // => request 객체로부터 HttpSession 객체 가져오기 HttpSession session = request.getSession(); session.setAttribute("id", id); System.out.println("로그인 성공"); forward = new ActionForward(); forward.setRedirect(true); forward.setPath("./"); } } |
>>>>> MainActivity.java
cv.put("loginType", "M");
- 한 줄 추가
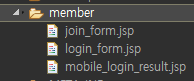
======== mobile_login_result.jsp 멤버폴더에 만들기
| <%@ page language="java" contentType="text/html; charset=UTF-8" pageEncoding="UTF-8"%> <!DOCTYPE html> <% // request 객체에 전달된 loginResult 값을 가져와서 출력 out.println("로그인 결과:" + request.getAttribute("loginResult")); %> |
- 다시 안드로이드 실행해보기
< MainActivity.java >
@Override
protected void onPostExecute(String s) {
super.onPostExecute(s);
// 결과값을 TextView 에 출력
tvResult.setText(s);
// 처리 결과로 리턴된 문자열을 사용하여 로그인 성공 여부 판별
// split() 메서드를 사용하여 ":" 문자를 기준으로 분리하여 두번째 문자열이 true 이면 성공
String[] results = s.split(":");
// Toast.makeText(MainActivity.this, results.length + "", Toast.LENGTH_SHORT).show();
if(results.length > 1 && results[1].equals("true")) { // 결과값이 true 일 때(로그인 성공일 경우)
Toast.makeText(MainActivity.this, "로그인 성공!", Toast.LENGTH_SHORT).show();
} else {
Toast.makeText(MainActivity.this, "로그인 실패!", Toast.LENGTH_SHORT).show();
}
}

'Dev.Program > Android' 카테고리의 다른 글
| 구글지도 설정 (0) | 2022.10.10 |
|---|---|
| Spinner / SQLite (0) | 2022.10.10 |
| logcat / ListView (0) | 2022.10.10 |
| 여러 Activity (0) | 2022.10.10 |
| Fragment / 메뉴와 대화상자 / Context_Menu / Toast (0) | 2022.10.10 |